
How to Check Groove Diameter After Roll Grooving
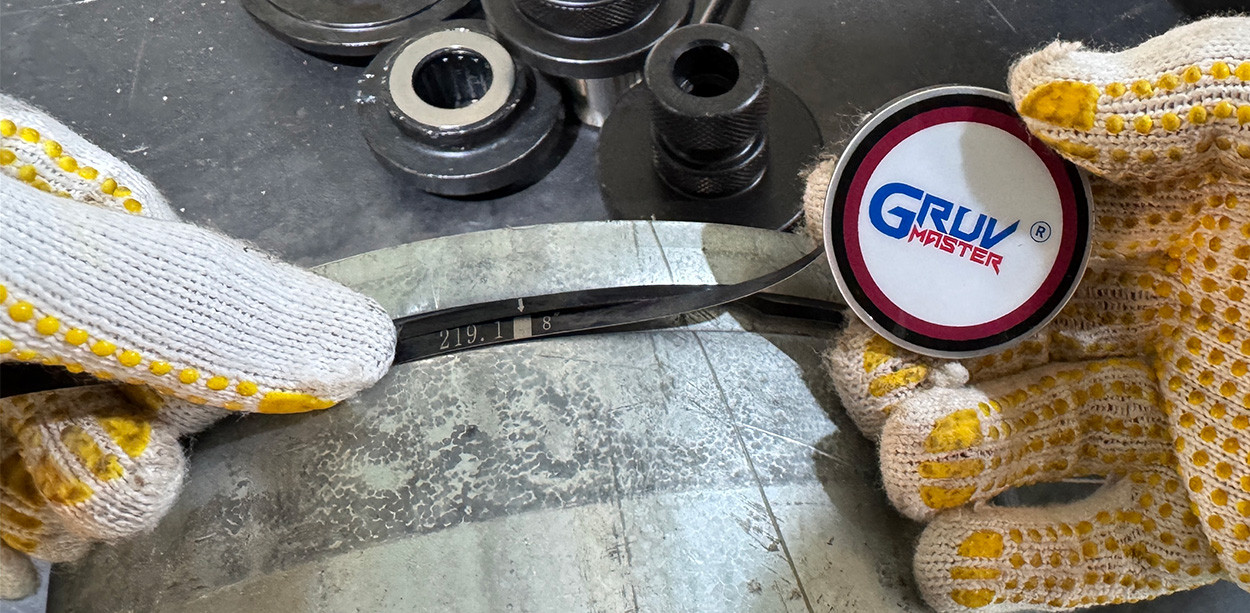
After roll grooving, a clean and even-looking groove is not enough. You should also check whether the groove diameter is within the required range, because a groove can look correct while still being out of specification.
The most practical method is to use a groove diameter tape or dedicated groove measuring tool. Wrap it around the groove, make sure it sits correctly, read the measurement, and compare the result with the applicable specification.
Correct groove dimensions help ensure proper coupling engagement and a more reliable grooved pipe connection.
Table of Contents
1.What Is Groove Diameter?
2.Why Should Groove Diameter Be Checked?
3.How to Measure Groove Diameter Correctly
4.What Else Should Be Checked?
5.Common Groove Measurement Mistakes
6.FAQ
What Is Groove Diameter?
After roll grooving, most operators first look at the groove profile: Is it even? Is the edge clean? Does the groove look consistent around the pipe?
These visual checks are useful, but they do not tell the whole story.
Groove diameter refers to the diameter measured at the grooved section after the pipe has been formed. It is different from the original outside diameter of the pipe and is one of the key dimensions that should be checked after roll grooving.
Why does it matter?
A grooved pipe joint does not work simply because there is a groove on the pipe. The pipe groove, gasket, and coupling housing must work together as a complete connection system.
If the groove diameter is incorrect, the coupling may not engage with the pipe as intended, even if the groove looks perfectly acceptable at first glance.
Why Should Groove Diameter Be Checked?
Roll grooving is a forming process. Inspection is what confirms whether the final result is actually within the required range.
In practice, many groove-related problems are not caused by the inability to form a groove. They happen because the groove is accepted based on appearance without being properly checked.
If the groove diameter is too large or too small, it may lead to problems such as:
· Poor coupling engagement
· Unstable sealing performance
· A coupling that feels unusually tight or loose during installation
· Potential reliability issues after the piping system is put into service
This is why groove inspection should not be treated as an optional step.
A simple rule is worth remembering:
A groove that looks right is not necessarily a groove that measures right.
How to Measure Groove Diameter Correctly
Measuring groove diameter is a straightforward process, but the measuring tool must be positioned and used correctly.
Step 1: Prepare the Proper Measuring Tool
Use a groove diameter tape or dedicated groove measuring tool suitable for the pipe and groove being inspected.
Before measuring, make sure the tool is in good condition and that the scale can be read clearly. A damaged, worn, or distorted measuring tool may affect the result.
Step 2: Position the Tape Correctly in the Groove
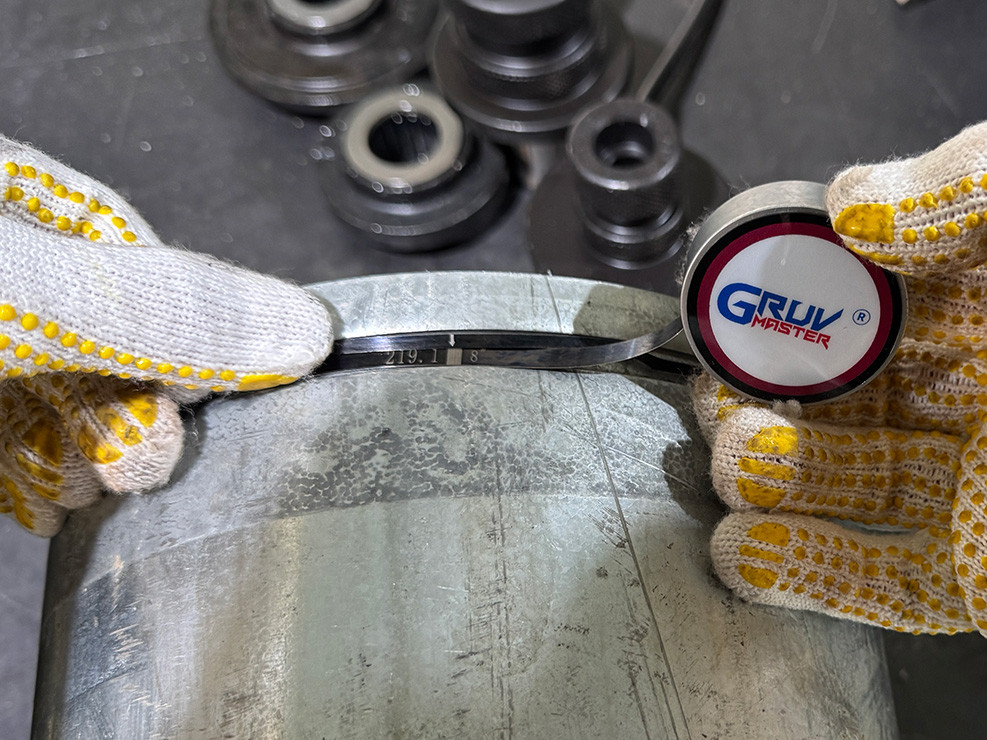
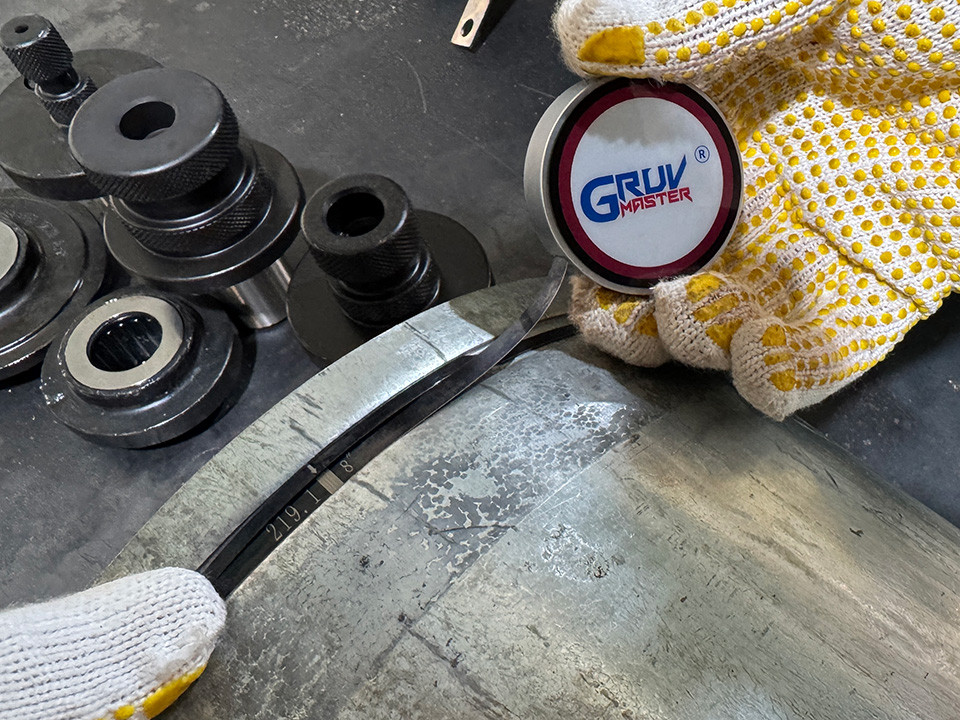
Place the measuring tape at the correct groove location rather than simply wrapping it around the outside surface of the pipe.
Positioning matters.
If the tape sits partly on the groove shoulder or outside the intended measuring area, the reading may no longer represent the actual groove diameter.
Make sure that:
· The measuring tool is positioned correctly in the groove
· The tape follows the pipe circumference naturally
· The tape is not twisted or angled
· There are no lifted or unsupported sections
Step 3: Wrap the Tape Around the Full Circumference
Once the tape is in the correct position, wrap it around the entire circumference of the groove.
The tape should sit evenly and remain properly tensioned.
If it is too loose or does not fully contact the groove, the reading can be inaccurate.
The goal is not simply to place the tape around the pipe. The tool should accurately follow the groove so that the measurement represents the actual formed diameter.
Video: Checking Groove Diameter After Roll Grooving
Step 4: Read the Measurement and Compare It With the Requirement
Once the measuring tool is correctly positioned, read the groove diameter and compare it with the applicable requirement.
This final comparison is important.
Taking a measurement is not the goal by itself. The real purpose is to confirm whether the groove is within specification.
If the reading is outside the required range, further checks may be needed, including:
· Roll groover settings
· Groove depth adjustment
· Pipe condition
· Machine setup
· Operating method
The basic inspection process should always follow the same logic:
Measure → Read → Compare → Confirm
What Else Should Be Checked?
Groove diameter is important, but it is not the only factor that determines groove quality.
For a more complete inspection, several other areas should also be checked.
1. Groove Width
The groove width affects how the coupling engages with the pipe.
Checking only groove depth or diameter without considering groove width gives only part of the picture.
2. Groove Location
The distance between the groove and the pipe end should also be checked.
A groove formed too close to or too far from the pipe end may affect proper coupling installation.
3. Groove Uniformity Around the Pipe
The groove should remain reasonably consistent around the full circumference.
A groove that looks correct in one section may still be uneven elsewhere.
If one area appears noticeably deeper or shallower than another, it is worth checking the pipe support, pipe alignment, machine setup, and grooving process.
4. Pipe-End Condition
The pipe end itself should also be inspected for:
· Obvious deformation
· Damage
· Burrs
· Unusual marks
· Conditions that may interfere with coupling installation
Even when the groove dimensions are close to the target values, a damaged or distorted pipe end can still affect the final connection.
Common Groove Measurement Mistakes
Even though groove measurement is simple, a few common mistakes can easily lead to an incorrect conclusion.
1. Relying Only on Visual Inspection
A smooth, clean groove does not automatically mean the dimensions are correct.
Visual inspection is useful, but it should not replace measurement.
2. Measuring in the Wrong Position
If the tape is not seated at the correct groove location, the reading will not accurately represent the groove diameter.
3. Leaving the Tape Loose
A loose, lifted, or uneven measuring tape can produce an inaccurate reading.
The tool should sit evenly around the full circumference.
4. Checking Only One Small Area
A groove is formed around the entire pipe.
Do not judge overall groove quality only by looking at one section. The full circumference should also be considered.
5. Measuring Without Comparing the Result
A number by itself does not tell you whether the groove is acceptable.
The reading still needs to be compared with the relevant groove specification.
Without that comparison, the inspection is incomplete.
FAQ
Do I still need to measure the groove if it looks good?
Yes.
A visually clean and even groove is a positive sign, but appearance alone cannot confirm that the groove diameter is within the required range.
Why use a dedicated groove diameter measuring tool?
Because it is designed for this specific type of measurement and allows the groove diameter to be checked directly around the pipe circumference.
It is generally more practical and reliable than trying to estimate the dimension with a conventional measuring tool.
Does an incorrect groove diameter mean the roll groover is faulty?
Not necessarily.
Groove dimensions can be affected by several factors, including machine settings, pipe condition, operator technique, pipe support, and the condition or selection of the grooving rolls.
The cause should be checked systematically.
Is checking groove diameter alone enough?
No.
Groove width, groove location, circumferential uniformity, and pipe-end condition should also be considered when evaluating overall groove quality.
Conclusion
Completing the grooving operation does not mean the work is finished. A truly reliable grooved connection depends on two aspects:
stable grooving formation, and standardized grooving inspection.
Among them, grooved‑diameter inspection is the most fundamental and critical step.
For field operators, developing the habit of inspecting immediately after grooving matters more than simply pursuing grooving speed. Only through measurement and verification can you confirm whether the groove is qualified for the subsequent installation process.
If you are performing grooved‑pipe construction, or selecting suitable grooving machines and inspection methods, make "checking the groove diameter after grooving" a standard procedure. It will make the whole connection process more stable and professional.